Learn HTML
At the end of the 1980s, the British computer scientist Tim Berners-Lee developed the basic components of the World Wide Web. As an employee at the European Organization for Nuclear Research (CERN), he initially devoted himself to an internal project, which intended to enable cross-country information exchange between CERN laboratories, partly in France and partly on Swiss soil. As the basis for the planned network infrastructure, Berners-Lee used hypertext, a text form that is conveyed through cross-references (hyperlinks) and written using a markup language. He co-developed this markup language, known as Hypertext Markup Language (HTML).
Together with many other components, such as the HTTP transfer protocol, the URL, browsers, and web servers, HTML is still the foundation of global digital networking. This means that it’s compulsory for developers to learn this web language. To help you get to know the principle of the markup language and to make it easier to get started, we have summarized the most important principles and tips for beginners in this HTML tutorial.
- What is HTML?
- Which software do you need to write HTML code?
- Creating the first HTML pages
- HTML: basics of the text structure
- Basic HTML framework: this is the basic structure of webpages
- How to integrate images, photos, and graphics onto your web pages
- Linking pages and content – the important role of hyperlinks
- On the home stretch – how to put your HTML page online
- CSS and JavaScript – why HTML is only the beginning
What is HTML?
HTML is one of the machine-readable languages, also known as 'computer languages' that enable interaction between computers and humans. It allows you to define and structure the typical elements of text-oriented documents, such as headings, text paragraphs, lists, tables, or graphics, by distinguishing them accordingly. The visual representation can be achieved using any web browser that interprets the code lines and therefore knows how the individual elements should be displayed. In addition, the HTML code may contain data in the form of meta information e.g. about the author. As a markup language, HTML is now mostly only used in its descriptive function, while the design is defined using stylesheet languages such as CSS (Cascading Style Sheets). In the beginning of the web era, it was quite common to make visual adjustments with HTML.
HTML has evolved from the now largely disappeared meta-language SGML (Standard Generalized Markup Language), a recognized ISO Standard (8879:1986). The same core notation of the SGML elements is also found in HTML. They are usually marked by a tag pair consisting of the start tag <> and the end tag </>. For some elements, the end tag isn’t required; furthermore, there are some empty elements like the line break <br>. In addition to the tags, the following HTML features are reminiscent of these examples:
- Document type declaration: information about the HTML version in use e.g. <!DOCTYPE HTML PUBLIC "-//W3C//DTD HTML 4.01 Transitional//EN" "http://www.w3.org/TR/html4/loose.dtd">
- Use of character entities: use of entities for recurring units, for example, < für „<“ or & for „&“.
- Comment labeling: comments are added in HTML according to the <!--Comment--> pattern.
- Attributes: supplementary properties of tags according to the <tag attribute="value"> pattern.
Which software do you need to write HTML code?
At the beginning of our HTML course, the question is: which software is best for writing HTML code? There is no general answer for this. On the one hand, there are so few requirements for the program that a simple text editor (found on every operating system) is sufficient. On the other hand, special HTML applications offer clear simplifications in code writing. How suitable are the various options for learning HTML?
Simple text editors
You do not need sophisticated software in order to write clean HTML code. A simple editor like the Windows editor, also known as Notepad, or the Mac equivalent, TextEdit (in plain text mode) are sufficient basic options. You don’t have the option of changing the layout of the text, but this is the task of HTML formatting anyway. You can also theoretically use word processing programs such as Microsoft Word or OpenOffice Writer, but you will not benefit from the added features that can help when learning HTML. In some cases, the superfluous features even slow down the learning process so you’re on the right track when using a simple text editor to acquire the HTML basics. These editors are pre-installed on every standard operating system.
HTML editors
In addition to simple editors and complex word processor programs, there are also special editors that provide assistance: for example, these applications emphasize syntactic accents and give you an excellent overview of the written code. In addition, any syntax errors are found if there are any. Another standard feature is the auto-completion function that provides you with suggestions for extending or completing the code when writing HTML tags. This feature is also able to automatically complete end tags. Many HTML editors have a preview function that allows you to check the preliminary results of your code lines at any time, just by pressing a button. A highly-recommended editor for Windows users is the free, GPL-licensed Notepad ++. A free solution for Unix operating systems is Vim.
There’s another option that has its own charm and is integrated into almost all website building kits and content management systems. These are HTML editors with real-image representation, better known as WYSIWYG editors. The acronym stands for the basic idea of these programs 'What You See Is What You Get'. These editors have been developed specifically for generating HTML code and you really don’t need very much expertise at all in the markup language to use them. Just like in a word processing program, you can structure your text using pre-made menu buttons without needing to place a single HTML tag on the page. The WYSIWYG editor generates that in the background, simultaneously, which has its clear advantages. For learning HTML, editors such as BlueGriffon aren’t very suitable – even if you are able to look at the generated code anytime you want.
Creating the first HTML pages
In the first step of the HTML tutorial, you will create a simple page that you can display using your browser. However, this isn’t a valid HTML page that has been built according to certain standards yet, but rather a pure test page. In order to create this page as well as other HTML examples in this tutorial, we have decided to use the Notepad++ editor mentioned earlier. If you are using a different program, the procedure may differ slightly from the following.
First, open the editor and save the new file under the name test. Choose 'Hypertext Markup Language File' as the file format, so that the browser knows that it’s an HTML page later on. If you are using a simple editor, you may have to select the film type 'All Files' (encoding: UTF-8) and define the HTML label directly in the 'File name' field by saving the file under the name test.html.
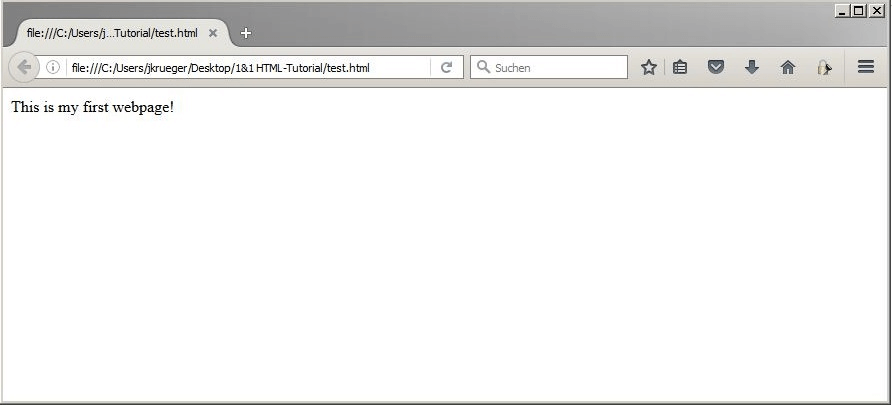
The generated file should now be displayed with your web browser’s icon. By double-clicking, you can open the page, but since all content is missing, you will see only a white page. So, in the next step, add the small sample text 'This is my first webpage!', save the document, and reopen the test.html file. The result should look something like this:
HTML: basics of the text structure
Your first website could be successfully created – even though you have not yet used any HTML markup language. However, if you insert a structured text with headings and paragraphs in the same way, you will find that you don’t get very far without tags. The formatting that you have added with a word processing program, for example, disappears in the browser view: breaks are automatically removed, blank spaces are grouped together, etc. The solution is to label the different text modules as such using the appropriate structural elements – in other words, to take a step into the world of HTML.
Define paragraphs using the <p> tag
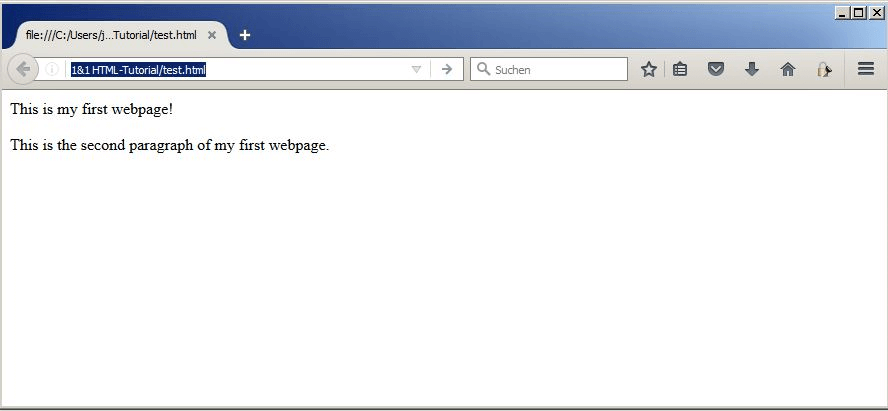
To indicate paragraphs, you need the <p> tag. The start tag marks the beginning of the paragraph and the end tag marks when the paragraph is over. The text is then placed between these two markers. In all HTML versions (except XHTML), the closing tag is optional, but it is good practice to include it when learning HTML. You can directly test the accuracy of the paragraph’s definitions on the newly-created test page by adding another section of text and marking them both using this tag:
<p>This is my first webpage!</p>
<p>This is the second paragraph of my first webpage.</p>
Placing the headings: the <h> tag
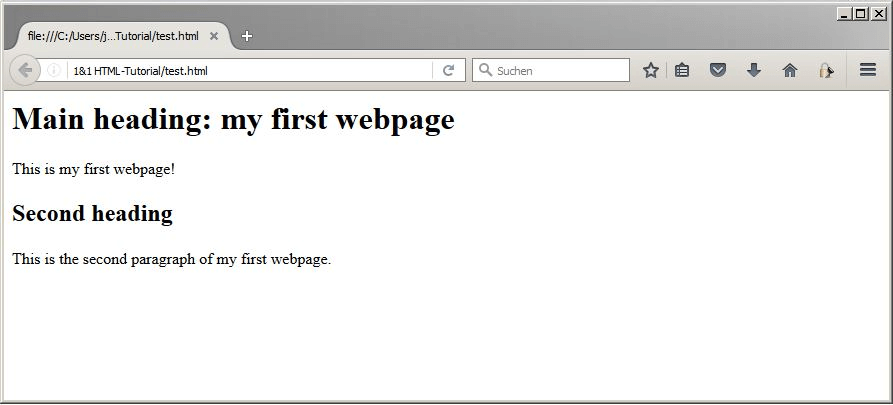
In order to structure your website’s text sections properly, it’s important to use headings. With HTML, you not only have the general ability to label these, but you can also set a clear hierarchy for all headlines you want to use. The tags <h1> to <h6> can be used, with <h1> being the main heading of the website. You should use this tag only once per page, unlike <h2> and the other heading tags. It is important to keep to a correct hierarchical order and not to jump between the different levels so that both readers and search engines can understand the text structure from the headings. We will add a main heading and a first sub-heading as an example on our test page:
<h1>Main heading: my first webpage</h1>
<p>This is my first webpage!</p>
<h2>Second heading</h2>
<p>This is the second paragraph of my first webpage.</p>
Emphasizing passages and words using italic or bold features: <i>, <em>, <b>, and <strong>
One of the most important HTML basics is the ability to emphasize individual text excerpts in a certain way. In this way, you can make sure the reader focuses on what you want them to and means they will concentrate on the most important elements. For example, you can use the <i> and <em> tags to italicize and emphasize phrases, technical expressions, or thoughts. However, italic writing generally slows down the reading flow, which is why you should use this tag sparingly. More important are the elements <b> and <strong> that make words and text excerpts bold. The <b> should be used for content that you want to make the user intentionally aware of. In contrast to this, the <strong> tag shows which words are important for content elements and to show browsers how to display words or sections.
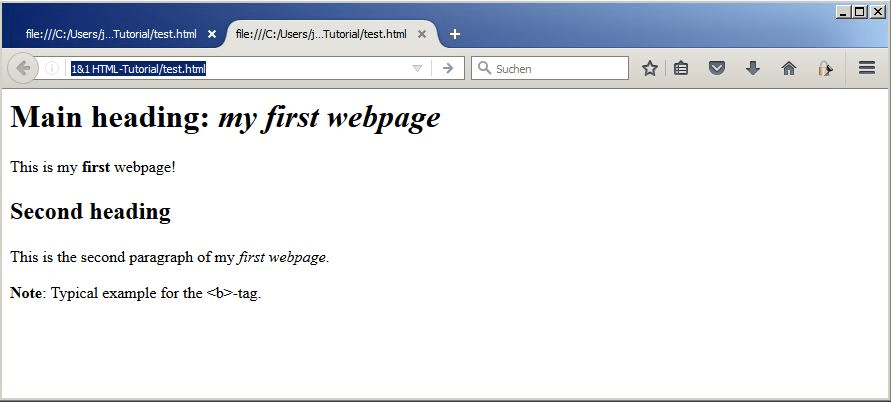
To illustrate the tags, we will extend our HTML code a bit:
<h1>Main heading: <i>my first webpage</i></h1>
<p>This is my<strong>first</strong>first webpage!</p>
<h2>Second heading</h2>
<p>This is the second paragraph of my <em>first webpage</em>.</p>
<p><b>Note</b>:Typical example for the<b>-tag.</p>
Creating lists: tailored lists using the <ul>, <ol>, and <li> tags
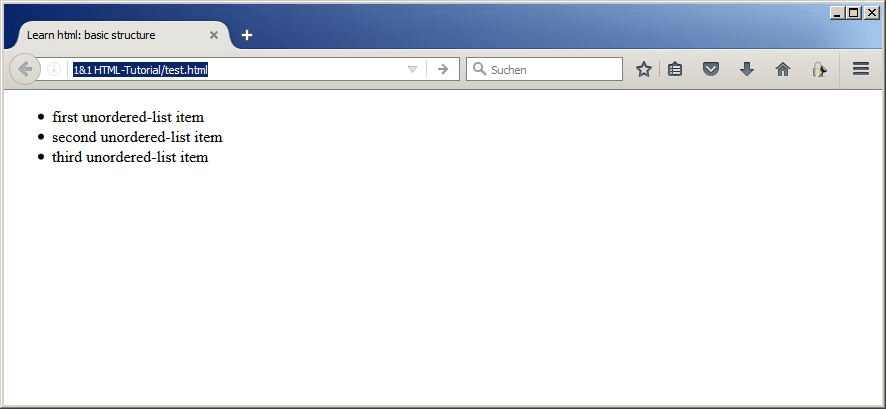
Lists aren’t only helpful when it comes to shopping: when designing texts, they can come in handy for loosening individual paragraphs and therefore optimizing the reader’s experience. With HTML, you can create both unordered and ordered lists for your web project. Use the <ul> tag to create unordered lists and <ol> to create ordered lists. The individual list points can be defined with the <li> tag, which only works in combination with one of the two types of lists. Test how HTML lists work by using the following code:
<ul>
    <li>first unordered-list item</li>
    <li>second unordered-list item</li>
    <li>third unordered-list item</li>
</ul>
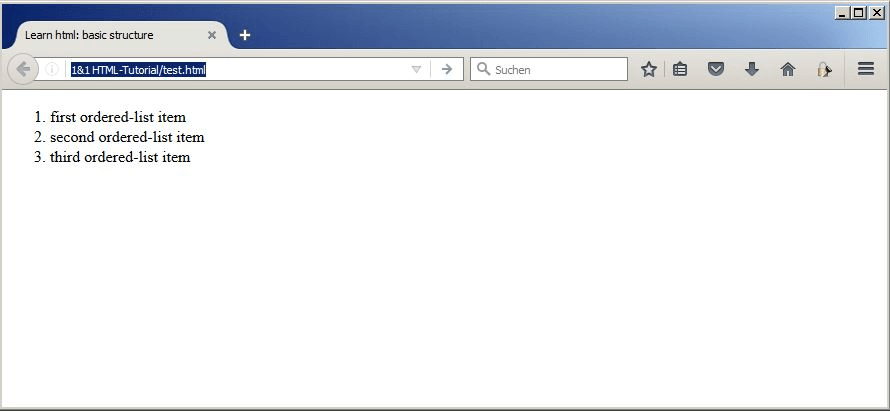
If you want to turn your list into a numbered list, simply swap the list type tag:
<ol>
    <li>first ordered-list item</li>
    <li>second ordered-list item </li>
    <li>third ordered-list item </li>
</ol>
Presenting structured data using tables: <table>, <tr>, and <td>
For many years, it has been customary to use HTML tables, not only for presenting complex data in a practical way but also for structuring the complete layout of a web page or text consisting of several columns. With the rise of CSS, however, this additional visual role has fallen into the background more and more, which means that the tables are used today for their basic function – for processing data. Each table consists of at least three components:
- <table>: the <table> start or end tag identifies the start or end of an HTML table. The browser can’t really do much with this markup alone since the tag doesn’t show the number of rows or the number of columns.
- <tr>: use the <tr> ('table row') element to add a row to the table. There’s no limit on the number.
- <td>: only once you’ve added columns have you completed the basic structure of your table. The tag <td> ('table data') is logically subordinate to a <tr> tag because one or more data cells are to be generated within one line. The content of a data field is between the opening <td> and the closing </td> element.
In order to understand the somewhat complex structure, we will now create a simple HTML table consisting of only one row and two columns:
<table>
    <tr>
        <td>first data field</td>
        <td>second data field</td>
    </tr>
</table>
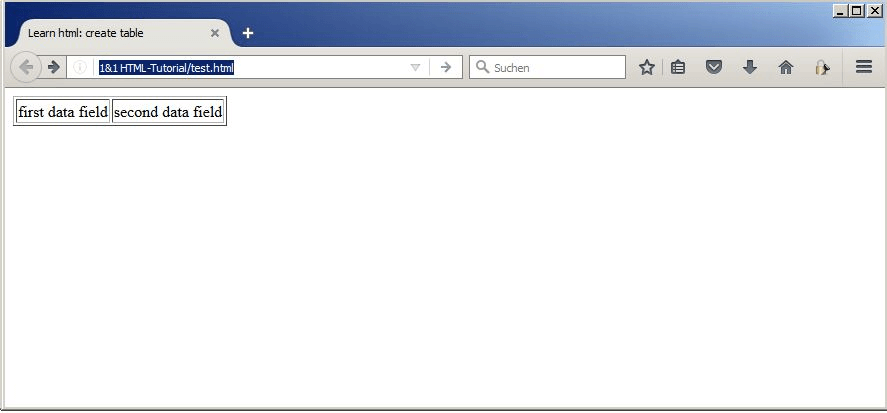
The preview of the generated HTML code makes it appear that an error may have occurred and that the table isn’t working as planned. The two columns haven’t been defined and it doesn’t look like a table at all. There is, however, a simple explanation for this: by default, HTML table cells do not have any visual borders. For this typical table identification, you must extend the <table> tag using the border attribute, including the value 1:
<table border="1">
    <tr>
        <td>first data field</td>
        <td>second data field</td>
    </tr>
</table>
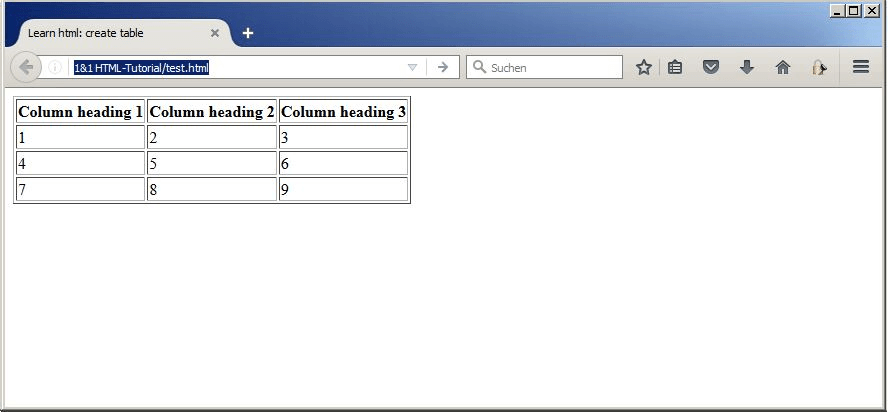
HTML offers the possibility of highlighting column headings. For this, it is necessary to enclose the relevant column with the <thead> tag and replace the <td> labeling of individual data cells with the <th> tags. To create an example table with four rows and three columns, including the heading, use the following HTML code:
<table border="1">
    <thead>
        <tr>
            <th>Column heading 1</th>
            <th>Column heading 2</th>
            <th>Column heading 3</th>
        </tr>
    </thead>
    <tr>
        <td>1</td>
        <td>2</td>
        <td>3</td>
    </tr>
    <tr>
        <td>4</td>
        <td>5</td>
        <td>6</td>
    </tr>
    <tr>
        <td>7</td>
        <td>8</td>
        <td>9</td>
    </tr>
</table>
Basic HTML framework: this is the basic structure of webpages
This section of our HTML tutorial is about the general structure of a website. HTML documents contain not only text, links, and other integrated content such as images and videos, but also the aforementioned meta information, which tells the browser, as well as search engine crawlers, how they should read the pages. When a visitor accesses a web page, they don’t see many of these additional details, only some in the title bar of the browser window, in the tab, in the history, or as a headline for search engine entries.
Keeping the code to a minimum while still including all necessary components means that the HTML page will look like this:
<!DOCTYPE html>
<html lang="en">
<head>
    <meta charset="UTF-8">
    <meta name="description" content="Here you can find all information about the HTML basic framework">
    <title>Learn HTML: The basic framework</title>
</head>
<body>
</body>
</html>
The file is therefore composed of the three areas DOCTYPE, head, and body, whereby the first component, which is the document type definition, must be the only one before the <html> tag. This is where you let the interpretive applications know which standard you used when creating the document – in this case, HTML5. Every browser recognizes this document type; in addition, it allows you to use both current HTML5 and older HTML codes, which is why you should use it by default, especially when learning HTML.
In the following <head> section, write down the header data if your HTML file. This includes, for example, the character encoding to be used by the browser (meta charset), the meta description (meta name="description"), and the title of the web page (title) that appears in the browser header. In addition, you can make countless other meta statements, even the information included in our example is optional, but you’re recommended to leave it in for a good search engine evaluation. One exception is the <title> information, which, in addition to the document type definition, is the only mandatory element of an HTML page. In the header, you can later add the link to your CSS file, which structured the website’s design. The <body> section contains everything that is to be displayed to the user in their browser.
Note: the tags for the HTML basic structure are optional and can theoretically be omitted. In this case, the browser automatically creates the tags <html>, <head>, and <body> and assigns the appropriate elements to them. It is, however, customary to write this information yourself. In addition, the breakdown makes the document easier to read, which is especially beneficial for HTML beginners.
How to integrate images, photos, and graphics onto your web pages
Texts are indisputably the most important part of general HTML pages. Visual stimuli in the form of images, photographs, or graphics, however, influence user experience greatly, which is why they are just as indispensable for a successful web presence. The following three formats are supported by all browsers:
- JPG: for photos or photo-like graphics with strong contrast and colorful diversity, you usually use the JPG format. JPG images support 16 million colors and heavily compress files although this may result in some loss of quality.
- PNG: graphics and logos are best saved in PNG format, which can display 256 (PNG8) to 16.7 million colors (PNG24). Unlike JPG, PNG compresses without reducing quality, but the file is also larger.
- GIF: GIF files can only display 256 colors, but are still required in web developments because they can be used to display small animations, navigational elements, or simple graphics.
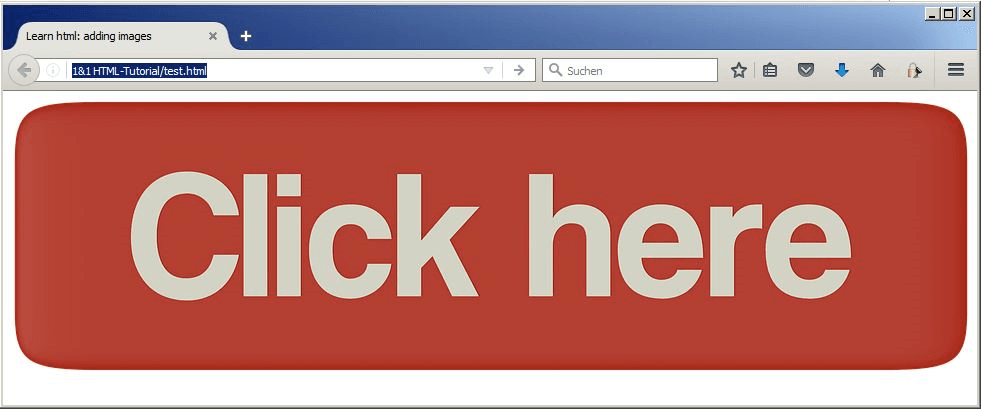
Regardless of the format, you can include an image with the <img> (image) tag in the desired web page. In addition, it is necessary to specify the storage location of this image, otherwise the browser can’t find it and therefore can’t display it. For this, you need the src (source) attribute and the relative path name of the image file. Simply create a subfolder named 'Images' in your website’s project folder (which also contains the HTML document) and store all relevant images there. Our HTML tutorial sample file has the file name graphic1.png and is located in the folder entitled 'Images'. The code used to integrate this graphic looks like this:
<img src="images/graphic1.png" />However, there are other attributes for images that are recommendable to use. You can specify the width and the height of the image. These values enable the browser to place a placeholder in the appropriate size on the page until the image has completely loaded. It can also simultaneously display additional content in the browser window without having to complete the loading process of the image file, which in turn speeds up the website’s general loading time. On the other hand, there is the alt attribute that can be used to define an alternative text for the image. You should include it in your HTML basic repertoire for a variety of reasons since it…
- Contributes to the page’s accessibility by offering an alternative to visually impaired users or when the page won’t load.
- Helps the search engine crawlers to classify images and also counts as additional content.
- Is specified in the HTML specification.
To extend these attributes, the HTML code looks something like this:
<img src="images/graphic1.png" width="960" height="274" alt="Learn HTML: this is how the embedded sample graphic 'click here' appears:" />Linking pages and content – the important role of hyperlinks
Hyperlinks, better known under the abbreviation 'links', are the main reason for the internet’s incomparable success. Without these electronic links, which lead the user to a different website or encourage them to carry out an action such as downloading a product, networking such as the internet wouldn’t be possible. There are three types of links:
- Internal links: internal links are used to structure the entire website and show visitors around. There are different structures that you can use. For a linear structure, for example, the user follows a certain path from page to page. Whereas for a tree structure, the user navigates from a home page to various subordinate pages. You can also place internal links within a single page, which allow the user to jump directly from the bottom of the page to the top.
- External links: external links are those that lead the user to different web projects. You use this type of link to offer your visitors extra value by directing them to another website. However, you should make sure that you don’t place too many links on a page, and also make sure that the content you’re linking to is trustworthy. Otherwise, you could be penalized by the search engine.
- Other links: not all links direct to HTML documents. Depending on the link target, clicking a link can also trigger a download, open an e-mail client, or activate a PDF viewer.
Internal links: how to link individual pages of your web presence
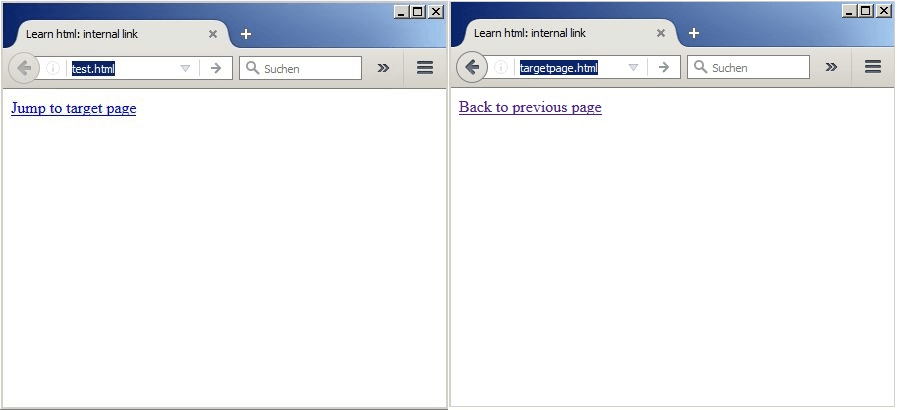
While you will likely have to design and develop a complex link structure for your web presence at a later stage in your HTML studies, this HTML crash course will show you how to internally link two pages. In addition to the test.html you already created, you need another HTML document. Be sure to give this second file a different name e.g. targetpage.html, and be sure that it can be found in the same directory as the test page.
In order to create a link, you require the HTML tag <a> (anchor), which is only to show that a link is being used. For this reason it cannot stand alone and needs the href (hypertext reference) attribute to specify the link destination. The link text, which the browser displays is blue and is underlined by default, should be written between the opening and closing <a> tags. Place the first internal link by adding the following code line to test.html:
<a href="targetpage.html">Jump to target page</a>If you have set up the link correctly, clicking on it should open up an empty page since the targetpage.html is still unprocessed. For this reason, we will add a new internal link to this document in the next step, which will take you back to the source page when clicked on:
<a href="test.html">Back to previous page</a>External links: how to link to content on other websites
If you want to add an external link to your page, you don’t require a different tag to the one used in internal linking and you do not need to know the directory where the page is saved. Links to third-party content only require the full URL – this contains all the required information. Since the linked content is not on your own web server, you have no influence on how an external link works, so it’s recommendable to check it regularly. Try to formulate an informative anchor text since meaningless placeholders such as 'here' do not give the visitor any information about where the link leads. Try using the following code when linking externally, which creates a link to our Digital Guide:
<p>HTML tutorial and numerous guides on the topic of websites, hosting, and much more at
<a href=" https://www.ionos.com/digitalguide ">IONOS Digital Guide</a>
</p>
When linking externally, you’re leading visitors away from your own web project. Theoretically, they can come back using the 'back' button, but many people don’t realize they have this option. There is a way to make the new page automatically open in a separate tab, which means that they won’t have to leave your website. The attribute target describes where a linked document should be opened. With the value _blank, you specify that you want the page to open in a new window or tab. The link code looks like this:
<a href="https://www.ionos.com/digitalguide" target="_blank">IONOS Digital Guide</a>On the home stretch – how to put your HTML page online
The sample pages that you have created in the HTML tutorial can be opened normally on your computer. However, if you send the corresponding page URLs to other people to show them the results, they won’t be able to do much. This is because the HTML documents and any embedded images, etc. are only stored locally on your PC and therefore can’t be sent to the requesting browsers. So that anyone can participate in your creation, you must first register your web project online and find the right hosting structure.
The first step is to find a suitable domain (web address) for your web project and to register it. You can register with any internet provider – at IONOS we offer many options for domain registration. The second step is to create the appropriate basis for your web project by either setting up and configuring your own web server or renting it from a web hosting provider. If you’re an HTML beginner, we recommend the latter option: you don’t have to deal with selecting, setting up, and maintaining the server software. You simply choose the desired web space package, which gives you the necessary storage space for the documents of your project.
For the last step, you need to upload your pages onto the rented web space. You usually need an FTP program for this. Using this client software, you can exchange data with the provider’s FTP server using the File Transfer Protocol. We have some excellent programs for you in the following guide. Detailed instructions and login data for accessing the FTP server are available directly from the respective hosting provider.
Note: when uploading to the FTP server, the directory structure remains, therefore it is worth investing in structuring from the outset.
CSS and JavaScript – why HTML is only the beginning
In the course of the tutorial, we emphasized several times that although HTML is the foundation for every website, the task of designing with the state of modern web development is almost a completely different language: including which colors the individual elements have, the layout of a page, or which font and size are used for text passages, headings, and other text elements. You can define all these points using the stylesheet language, Cascading Style Sheets (CSS). The strict separation of content and design makes the analyzing and maintaining major web projects much easier. After learning HTML, it’s recommendable to familiarize yourself with CSS so that you can give your HTML pages the desired appearance.
One component of modern websites that hasn’t yet been mentioned is JavaScript. You can expand your HTML pages with dynamic elements using this script language. The dynamic elements enable visitors to interact with your pages and come in the form of picture galleries, dynamic navigation menus, or external data downloads. For both JavaScript and CSS, you will find numerous ready-to-use code snippets, which you can integrate directly into your documents (CSS and JavaScript), without having to write your own scripts. Before doing so, however, you should have already developed a basic understanding of the two web languages in order to use these code lines correctly and to be able to troubleshoot problems if they occur.

